bebe logo

Color Correcting Guide: How to Neutralize Every Skin Concern

Achieving a flawless, airbrushed complexion is the ultimate foundation for any stunning make-up look.

Sanya Anand

Sanya Anand

Group
Keep reading to know...

Yet, persistent skin concerns—from stubborn dark circles to persistent redness—can often peek through even the highest-coverage foundations. Enter the unsung hero of your cosmetics bag: color correction makeup. This master technique, once reserved for professional artists, is now an essential skill for anyone serious about perfecting their base.

icon

01What Is Color Correcting?

What Is Color Correcting?

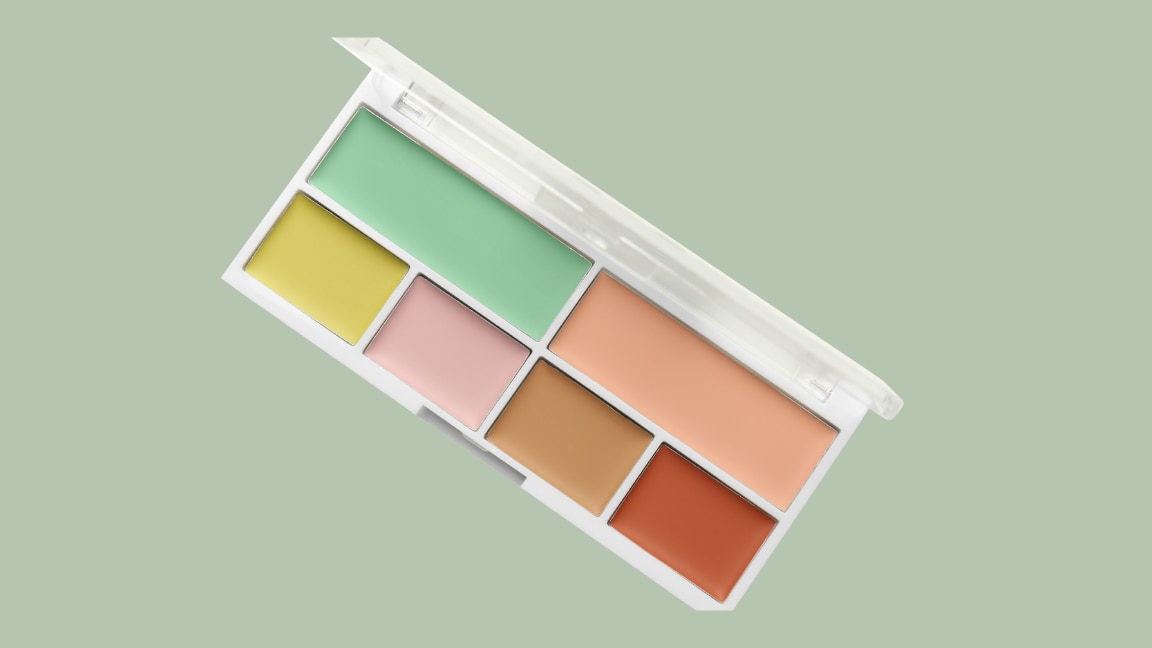
What is color correction makeup? Simply put, it's the strategic use of coloured concealers or primers to neutralise unwanted skin tones and discolouration before applying your skin-toned base products. Unlike traditional concealers, which simply attempt to cover, colour correctors work on the principle of cancellation, ensuring that the final layer of foundation or CC cream appears true to tone and bright, not grey or ashy. This allows for a far lighter, more natural-looking application of your regular complexion products.

02Understanding Color Theory in Makeup

Understanding Color Theory in Makeup

The secret to effective colour correcting lies in the colour wheel. Opposite colours cancel each other out—a principle known as complementary colours. By applying a hue directly opposite your skin concern on the colour wheel, you achieve a neutral base.

Skin ConcernNeutralising ShadePurpose
Redness (Acne, Rosacea)GreenCancels out red tones for a balanced canvas.
Dark Circles/Spots (Blue/Purple hue)Peach/OrangeLighter peach for fairer skin; deeper orange for darker skin tones.
Dullness/Sallowness (Yellow hue)Lavender/PurpleBrightens a sallow, yellow-toned complexion.
Dark Spots (Brown/Grey hue)Yellow/RedYellow brightens lighter skin, red corrects deeper tones.
No products available

03Shades and Their Uses

Shades and Their Uses

Mastering the following correcting shades will transform your base routine:

  • Green: Your go-to for battling redness. Dab lightly on blemishes, around the nose, or across areas affected by rosacea. Remember: Less is always more with green.
  • Peach/Orange: Crucial for tackling dark under-eye circles or hyperpigmentation that appears blue or purple. Choose a shade appropriate for your depth—a soft peach for fair to light skin, moving to a vibrant orange for medium to deep skin tones.
  • Yellow: Excellent for concealing mild redness and neutralising slight purple undertones, as well as brightening general dullness on fair-to-medium skin.
  • Lavender/Purple: The remedy for a sallow or yellow-tinged complexion. A light sweep across the face can instantly revitalise a dull look.

04Step-by-Step Color Correcting Application

Wondering how to use color correcting makeup for a seamless finish? Follow this refined, layered approach:

  1. Prep and Prime:
Prep and Prime:

Begin with a freshly moisturised face. Next, apply a pore-blurring primer like the Lakmē Unreal Blur Perfect Primer. This step is non-negotiable; it creates a silky-smooth canvas, minimises the appearance of pores, and ensures your make-up lasts all day.

  1. Apply Corrector:
Apply Corrector:

Using a small, firm brush or your fingertip, apply a minimal amount of the chosen colour corrector directly onto the discoloured area only. Do not blend outward. You want to stamp the product just onto the issue spot.

  1. Softly Blend:
Softly Blend:

Gently pat the edges of the corrector into the skin. The goal is to neutralise the colour, not conceal it completely. The original discoloration should look muted, not masked by the corrector's colour.

  1. Layer a Complexion Base:
Layer a Complexion Base:

Follow with a lightweight base product to even out your overall skin tone. For a natural, radiant finish, we recommend the multitasking Lakmē 9 to 5 CC Cream. This light-to-medium coverage cream is perfect for daily wear, evening out the skin tone without undoing your careful colour correction.

  1. Conceal (If Necessary):
Conceal (If Necessary):

Only if needed, lightly tap a skin-toned concealer over any corrected areas. Use a gentle, patting motion to avoid disturbing the layers underneath.

  1. Set:
Set:

Set your base with a fine translucent powder, focusing on the T-zone and under-eye area, to lock your flawless base in place.

05Common Mistakes to Avoid

Common Mistakes to Avoid

The wrong application can be worse than none at all. Be sure to sidestep these common pitfalls:

  • Applying too much product: Over-correction will result in your base looking cakey and the corrective colour peeking through. A tiny dot is often all you need.
  • Blending too vigorously: Rubbing will lift the product and mix it with your base layer, creating a muddy finish. Always use a gentle patting or stippling motion.
  • Skipping a primer: Applying colour correction directly onto bare skin can lead to patchy coverage and poor wear-time.
  • Using the wrong shade: A green corrector on a very deep skin tone might leave an ashy cast. Always ensure you are using the correct depth of peach/orange for dark areas.

06Expert Tips for a Flawless Finish

Expert Tips for a Flawless Finish

Glow and Lovely Glass Bright Ultra Light Gel Crème is your secret weapon for the ultimate pre-make-up boost. Before applying your primer, work a small amount of this gel crème into your skin. Its ultra-light formula, enriched with ingredients like Niacinamide, hydrates and promotes a translucent, luminous 'glass skin' effect from beneath your make-up. This natural glow beautifully complements the perfected, neutral canvas created by your color correction makeup, resulting in a base that looks naturally radiant and truly effortless. Remember: perfect make-up begins with prepped, luminous skin.

07Conclusion

Mastering colour correction makeup is a game-changer for achieving that coveted, perfectly balanced complexion. By understanding the principles of colour theory and applying a light, strategic hand, you can effortlessly neutralise any skin concern, paving the way for a truly flawless final look.

08FAQs

Q: Do I need to use colour corrector every day?

A: Not necessarily. Only apply color correction makeup to areas where you have specific discolouration (redness, dark circles) that your CC cream or foundation can't handle on its own.

Q: Can I use my foundation brush to apply the corrector?

A: It is best to use a small, dedicated brush (like a precision concealer brush) or your fingertip. This allows you to place the product precisely on the area of concern without spreading the colour to surrounding skin.

Q: Is a CC cream enough after correcting?

A: Often, yes! Products like the Lakmē 9 to 5 CC Cream provide just enough coverage to finish evening out the neutralised areas without feeling heavy. If you have particularly challenging discolouration, a lightweight liquid foundation can be used instead.

Sanya Anand

Sanya Anand

Sr. Copywriter, BB Team

Sanya Anand is a lifestyle writer who's always plugged into the buzz. When she's not serving up hot takes on skincare and daily rituals, you'll find her having 12 am experimental cook-out sessions.

Share
Download as pdf