Face Contouring for Every Shape: Step-by-Step Tips and Common Mistakes to Avoid

Master face contouring with our easy guide for every face shape. Learn tips, mistakes to avoid, and step-by-step contour tutorials for a flawless look

Shivani Pathak

Shivani Pathak

02 Sep ‘25
Face Contouring Makeup Tips Contour for Face Shapes Everyday Makeup

Keep reading to know...

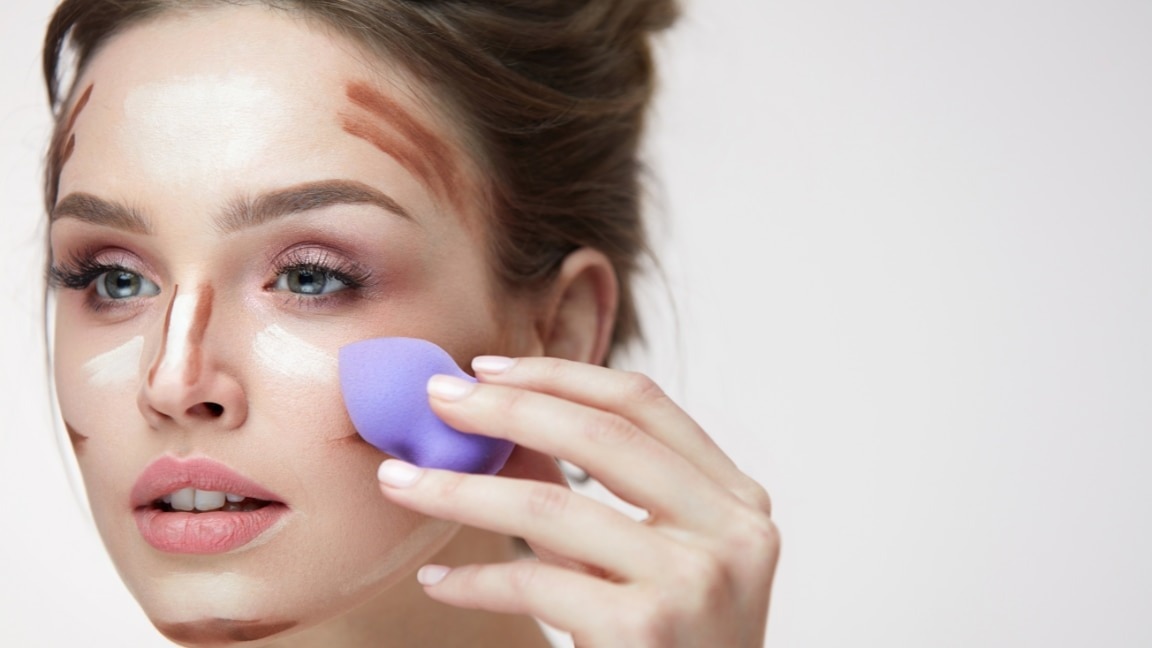
Contouring might seem like a scary word, meant just for makeup pros but that’s not true. Face contouring isn’t just for professional makeup artists or red carpet events anymore, it’s a technique that can work for everyday makeup too, as long as you know the basics. Whether you want to add a bit more definition to your cheekbones, slim down your jawline, or simply enhance your natural features, face contouring can be your secret weapon.

And no, you don’t need 20 different products, an hour in front of the mirror or a 100 hour watchtime on makeup tutorials to get it right. With the right products, placement, and a little practice, contouring can become as easy as blending your daily foundation.

What Is Face Contouring & Why Do It?

What Is Face Contouring & Why Do It?

Simply put, face contouring is the art of using makeup (usually in shades darker than your skin tone) to create shadows and definition on your face—This contrasts with highlighting, which uses lighter shades to bring certain areas forward. Together, contouring and highlighting can subtly (or dramatically) reshape your features — from sculpted cheekbones to a snatched jawline.

Contour for Different Face Shapes: Step-by-Step

One size doesn’t fit all when it comes to contouring. The placement of your contour depends largely on your face shape. The goal is to balance proportions and enhance your natural bone structure.

1. How to Contour Round Face

How to Contour Round Face

A round face tends to have softer angles, so the aim is to create the illusion of length and definition.

  • Cheekbones: Start from the ear and sweep your contour diagonally towards the corner of your mouth, stopping midway.
  • Jawline: Lightly contour along the jaw to create more definition.
  • Forehead: Add a bit along the temples to make the face appear longer.


When learning how to contour a round face, remember: blending is everything. Harsh lines can make your contour look obvious rather than natural.

2. Face Contouring Oval Face

Face Contouring Oval Face

Oval faces are often considered the most balanced shape, so the goal is to enhance rather than reshape.

  • Cheekbones: Apply contour slightly under the cheekbones, blending upwards.
  • Jawline: Add a light touch near the hairline to keep proportions balanced.
  • Forehead: A gentle sweep under the jaw adds structure without over-defining.


For face contouring oval face, less is often more — you just want to bring out your best features.

3. Contour Square Face

Contour Square Face

Square faces have strong jawlines and broad foreheads. The aim is to soften angles and elongate the face.

  • Cheekbones: Angle the contour slightly downwards for a more tapered look.
  • Jawline: Apply contour along the jaw to slightly soften the edges.
  • Forehead: Contour near the temples and along the hairline to balance width.


When you contour square face, focus on diffusing your contour well to avoid adding more sharpness to your already-defined angles.

Lakme Unreal Blur Perfect Primer

₹675.00 ₹750.00

Lakme Xtraordin-airy Mattereal Mousse Foundation

₹809.00 ₹899.00

How to Apply Contour Face Makeup Like a Pro

Whether you’re doing contour for different face shapes or just adding a touch of shadow, the process is pretty straightforward:

1. Prep Your Base

Prep Your Base

Start with clean, moisturized skin. Applying a primer helps create a smooth base for makeup application and ensures longer-lasting results.

2. Apply Contour

Apply Contour

Contouring helps sculpt and define your facial features by creating shadows and depth. Use a matte contour product that’s 1–2 shades deeper than your natural skin tone. You can use cream or powder based on your preference and skin type. Here's how to apply it to each area of your face:

  • Cheeks

Cheeks

To find the natural hollows of your cheeks, gently suck them in — you’ll notice a shadow line forming from the center of your ear towards the corners of your mouth. This is where your contour should go.

Application: Using a contour brush or beauty sponge, apply the product in a horizontal or slightly upward-angled line starting near your ear and blending towards the middle of your cheek — but stop about halfway; don’t drag it too far in.

Blending Tip: Blend upwards, not down, to lift the face and maintain a natural shadow. Avoid harsh lines by blending with a clean brush or sponge.

  • Jawline

Jawline

Contouring the jaw helps sharpen the lower edge of your face, especially if you want a more defined or slimmer appearance.

Application: Apply contour directly along the jawbone, starting from the back (near the ear) and working toward the chin.

Blending Tip: Blend downward into the neck to avoid a visible line of demarcation between your face and neck — this ensures a seamless transition and a more natural finish.

  • Forehead

Forehead

If you'd like to create the illusion of a shorter or more proportioned forehead, contouring along the hairline and temples can help.

Application: Apply contour along the outer edges of your forehead, focusing on the temples and the top of the forehead near your hairline.

Blending Tip: Use circular motions to diffuse the contour into your hairline. This softens the contrast between your skin and the product, creating a subtle shadow effect.

  • Nose

Nose

Contouring the nose can help it appear slimmer, straighter, or more defined depending on your technique.

Application: Using a smaller brush or a precise contour stick, apply two thin vertical lines down each side of the nose bridge, starting from just beneath the inner brows and stopping before the nostrils.

Blending Tip: Blend carefully with a small brush or sponge to avoid muddying the lines. You can also apply a light concealer or highlighter down the center of the nose to enhance the sculpted effect.

3. Blend

Blend

Use a makeup sponge or brush to blend the contour seamlessly into your skin. Blending well avoids harsh lines and creates a natural look.

4. Apply Highlight

Apply Highlight

Use a highlighter to accentuate areas you want to bring forward: Cheekbones: Apply on the tops of your cheekbones for a lifted effect. Nose: Apply along the bridge of your nose for a subtle highlight. Cupid's Bow: Highlight the cupid’s bow to enhance your lips. Chin: Apply a bit on the center of your chin for balance.

5. Set with Powder

Set with Powder

Lightly dust a translucent setting powder over your face to set the makeup and reduce shine, ensuring a matte and natural finish.

6. Add Blush

Add Blush

Apply blush to the apples of your cheeks for a healthy flush of color and a natural glow.

Common Contouring Mistakes to Avoid

Common Contouring Mistakes to Avoid

Even the most gorgeous contour can go wrong if you skip these basics:

  • Going Too Dark: A contour shade that’s too deep can look muddy.
  • Harsh Lines: Blend, blend, and then blend some more.
  • Wrong Placement: Contouring too low can drag your face down, while placing it too high can look unnatural.
  • Skipping the Base: Without a smooth base, your contour will catch on dry patches and look patchy.

Pro Tips for Flawless Face Contouring

Pro Tips for Flawless Face Contouring

  • Use Creams for a Natural Look: Especially for everyday makeup.
  • Powders for Longevity: Great for events or long days.
  • Layer Lightly: Build up product instead of going in heavy from the start.
  • Highlight Alongside Contour: A little glow on the high points of your face can take your contour to the next level.


Face contouring doesn’t have to be intimidating. Once you understand your face shape and the basics of placement and blending, it becomes just another fun step in your makeup routine — one that can totally transform your look in minutes. For best results, always start with a smooth, prepped base. A product like the Lakmē Unreal Blur Perfect Primer is perfect to blur pores and fine lines, ensuring your contour blends seamlessly. Follow it up with a breathable base like the Lakmē Xtraordin-airy Mattereal Mousse Foundation, which gives a soft matte finish without looking cakey.

With the right products and a touch of practice, you’ll be serving perfectly sculpted cheekbones, jawlines, and foreheads in no time.

FAQs

Q1. Can I contour without foundation?

Yes! If you prefer a natural look, you can apply contour directly over bare, moisturised skin — just make sure to blend well.

Q2. Do I need separate products for contouring and bronzing?

While both add warmth, contour is cooler-toned to mimic shadows, whereas bronzer is warmer to give a sun-kissed look.

Q3. How do I stop my contour from looking muddy?

Pick the right undertone and always build up in light layers, blending thoroughly between each application.

BePicks

Contouring Basics Face Shapes Product Placement Common mistakes
Shivani Pathak

Shivani Pathak

Shivani Pathak is a Mumbai-based lifestyle writer. She has written across a diverse range of formats, including digital features, interviews, trend stories, personal essays, and listicles. Her work has appeared in publications such as Tweak India, Luxebook, DNA, Mongabay, and Indiaspend. When she’s not writing and obsessing over sentence structures, you can find her buried in a book with a cup of coffee by her side.