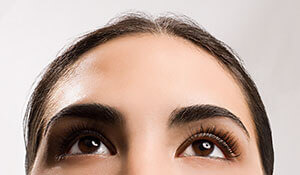
Smokey eyes are slowly taking a back step and making way for the next hot new trend, metallic eyes! Want to make a statement with your eye makeup? Then go metallic, girl! Whether you want to glam up for a party, festival or wedding, metallic eyes look all things dreamy and sassy.
However, there’s a thin line between messy (the fallout can be a bit of a bummer)and glamorous, when it comes to metallic eyes. While it’s a great way to amp up your eye makeup, you certainly need some practice to nail it. This is where we step in. We’ve got you covered with a simple 5-step guide that will make the process seamless and leave you with terrific results.
Step 1: Prep your lids and brush ‘em brows
If you want your metallic eye makeup to stay put all through the evening, then primer is your saviour. Take a dollop of primer on your fingers and apply it to your lids. Skipping primer means inviting trouble especially if you have oily skin. Going over with your eyeshadow directly on your lids may not make your eye makeup last for longer.
Once you’ve prepped your lids, groom your eyebrows. All you need to do is just take a spoolie and brush your brows out, fill them in and set them with clear gel, and you are set!
Step 2: Time to pack it on
While metallic makeup is a risky move in itself, acing it effortlessly is another ballgame altogether. You want the metallic pigment on your eye lids, and not so much on your cheeks, so be careful of the fallout. The best way to keep any fallout at a minimum is to use your fingers and press the shadow with your ring finger gently onto your lids. Avoid sweeping the shadow as you would do on any other regular day. Just pack it on!
Step 3: Finally, grab a clean brush
With the help of a clean brush, soften the edges and blend the shadow out slightly past your crease. A dense, round top brush is best to cleanly blend the edges of the eyeshadow. Then you can use a flat top brush dipped in a little concealer to clean up the edges.
Step 4: Add definition
Metallic eyes by itself may not stand out. It is, therefore, important to add definition to the look. All you need to do is take a black kajal pencil to line your waterline. Next, go ahead with tightlining. Now, take the same kajal or use an eyeliner to add a thin stroke close to your upper lash line. Doing so will define your metallic eye makeup and take it a notch up.
Step 5: Blend and blend some more!
Take a flat brush, dampen it and press the shadow into your lower lash line. Blend all the way into the inner corner of your eyes. Take very little pigment because you don’t need much for this small area. You can always add more later if you wish. Finish with mascara! To clean up messy edges and any fallout, take a cotton swab and lightly dab away.
Lastly, add generous coats of mascara to both top and bottom lashes. Doing so will not just add volume but also complete your look with panache.
Image courtesy: Pinterest